<i>Sous-vide</i> cooking: Keeping the meat a consistent shape, size

There’s more to sealing meat for sous-vide cooking than throwing it in a plastic bag. Because uniform heating is so important in sous-vide cooking, you need to make sure the meat is a consistent shape and size. There are several ways to accomplish this.
• One approach is to roll the ingredient you’re going to cook into a cylinder using food-grade plastic wrap. Start by clearing a level, smooth work space that allows for an 18-by-24-inch sheet of plastic. Soak a kitchen towel in water and then wring it out so that it is just damp, and then use that to dampen the work surface — this will help the plastic adhere.
Stretch a sheet of 18-inch-wide plastic wrap toward the edge of the table so that it hangs over the edge by about 5 inches and cut it from the box — the sheet should be oriented lengthwise so that it stretches 24 inches away from you. Using a dry towel and working from the center, push out any air pockets from under the plastic wrap (a credit card or other stiff but flexible card works well too). Fold the very top edge of the plastic wrap over a few times — this will create a tab that is easy to find for removal after cooking.
Before rolling, allow the meat to temper to room temperature — something taken directly from the refrigerator will drop the temperature of the water bath below where you want it to be. Place the meat or fish to be rolled about 2 inches back from the edge of the table and fold the plastic over — there should be enough plastic to cover the meat and still leave an overlap of 2 or more inches.
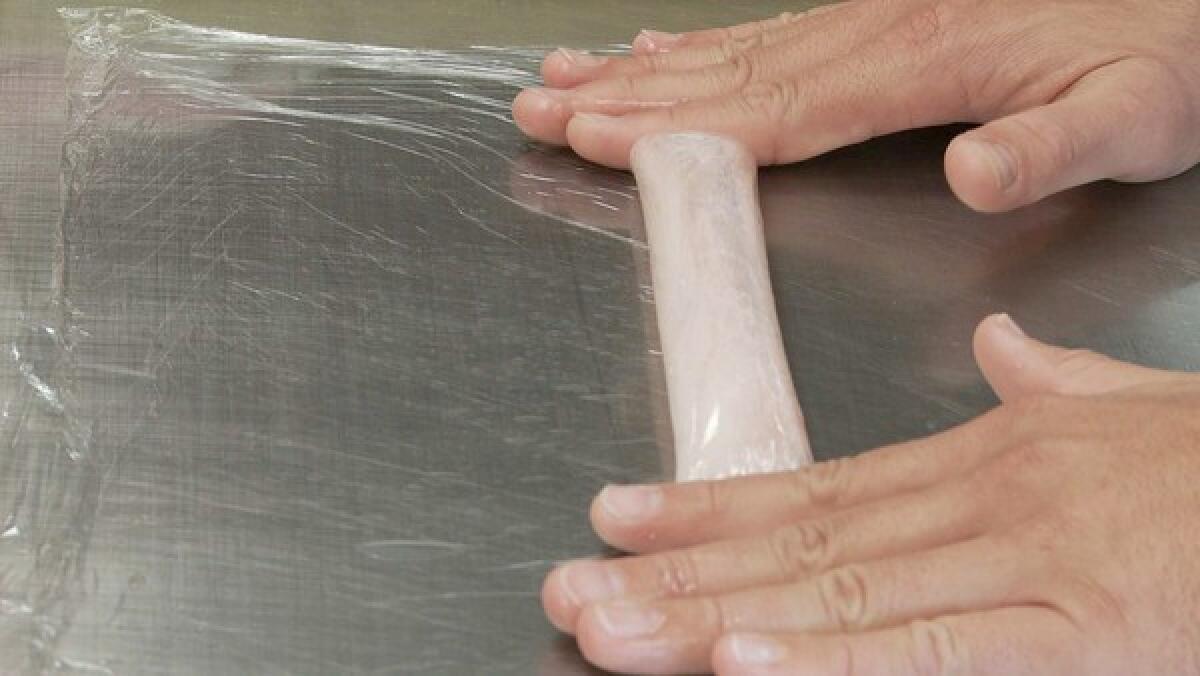
Wrap both hands over the meat and, using your fingertips to secure the plastic, pull back firmly to tighten the meat into a cylindrical shape (if the plastic slips it’s because the workspace is too wet — dry it off and start again). Maintaining tension and smoothing the plastic outward to remove any air bubbles, roll the meat all the way to the end of the piece of plastic wrap.
Pinch either end of the cylinder and, using gentle pressure to create traction, roll the meat away from you on the counter to tighten the cylinder and create plastic wrap “ropes” on either end of the shape. Pull to stretch the ropes apart — this will tighten the cylinder and create additional pressure. Tie off one end as tightly as possible, pushing the knot down into the meat to secure the shape. Ensure that the other side is still tight — rolling additionally if needed — and then repeat. Trim to about 1 inch of plastic wrap rope on either end. If air bubbles are visible, eliminate them by poking a needle through the plastic.
• To maintain the flat shape of a piece of meat, you can follow the same procedure up to the point where you place the meat on the plastic. At that point, rather than rolling the meat, fold the plastic over it and pull back with your fingertips to tighten. Continue folding the meat in the remaining plastic, smoothing any air bubbles out toward the ends after each fold. When you’ve used the whole sheet of plastic, fold the ends of the plastic wrap under and pull tight to seal the package. Repeat the process with a second sheet of plastic to seal the package even more tightly (you can use less plastic on the second time — just enough to seal the ends of the first wrap). Again fold the ends under and then secure it with tape.
• For pieces of meat that are not suited to rolling or folding, use a zip bag. Make sure it is labeled either heavy duty or freezer-grade. Though these bags are convenient, it is very difficult to remove enough air to ensure even and efficient cooking. So instead add an additional cooking medium (for example oil or flavored liquid) to facilitate the transfer of heat from the water bath. Place the meat and any flavorings flat at the bottom of a bag that is about twice the size of what you’re cooking. Add enough oil, melted butter or other liquid to cover the ingredients and then carefully flatten the bag until the liquid reaches the top and there are no air bubbles. Seal, fold over and secure the bag top with tape.
Zip bags are made from a plastic that has a softening point of 195 degrees, so if you use this method take great care not to pour boiling or near-boiling water into the water bath while it is cooking. If residual air pockets cause the bag to float after you’ve put it in the water bath, keep it submerged by laying a clean kitchen towel over the top.
— Thomas Keller
More to Read
Eat your way across L.A.
Get our weekly Tasting Notes newsletter for reviews, news and more.
You may occasionally receive promotional content from the Los Angeles Times.


