Why we made a Chicano Moratorium project zine
In August, the Los Angeles Times published a series of stories, videos, graphics and archival materials on the Chicano Moratorium. This series of anti-Vietnam War activism ended with a rally in East Los Angeles on Aug. 29, 1970, that attracted over 20,000 attendees. It started in peace but turned into the biggest, bloodiest disturbance in Los Angeles since Watts five years earlier and led to the death of three people, including pioneering Times columnist Ruben Salazar.
The response to our series was overwhelming. Many readers admitted they had never heard of these events even though they were Mexican American or had lived their entire lives in Southern California. The only real complaint was a logistical one: Readers who weren’t subscribers inevitably hit our paywall and couldn’t read the whole thing.
Great journalism costs money, of course. But we also heard from high school teachers and college professors who asked whether we could make some articles available for their students.
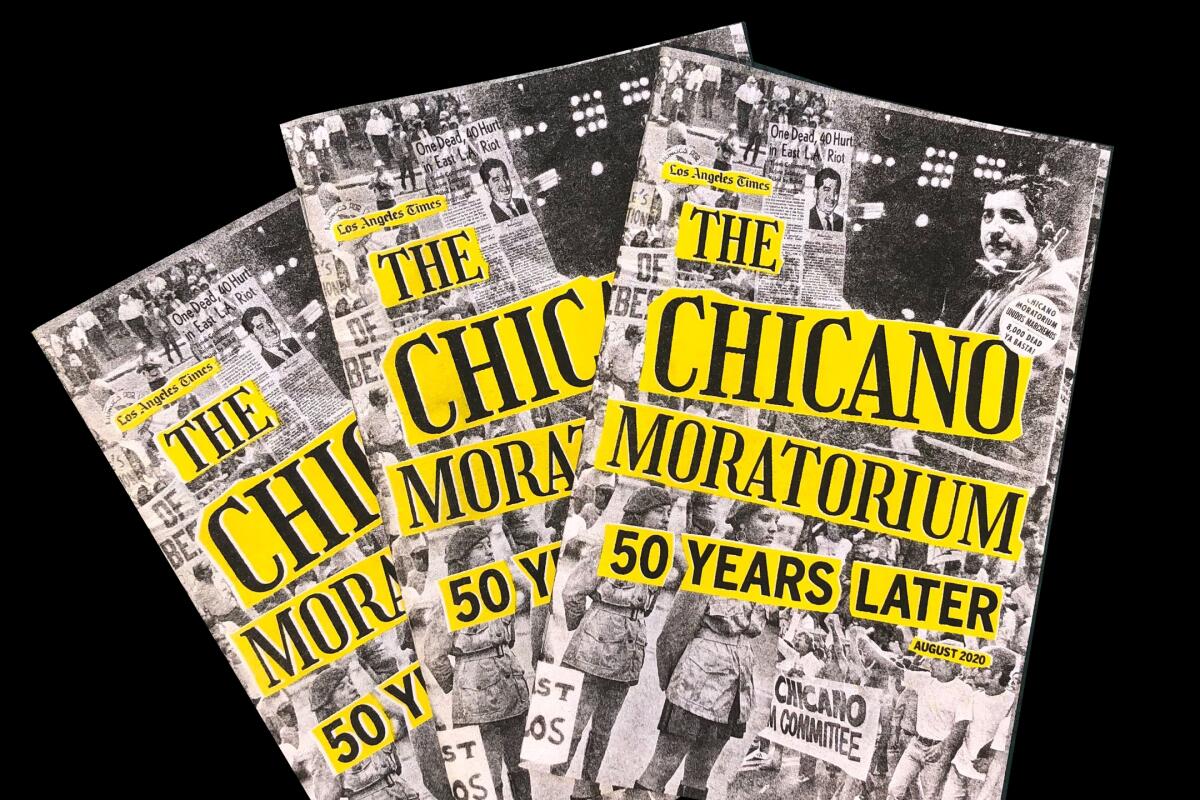
So we did better than that: We created a zine.
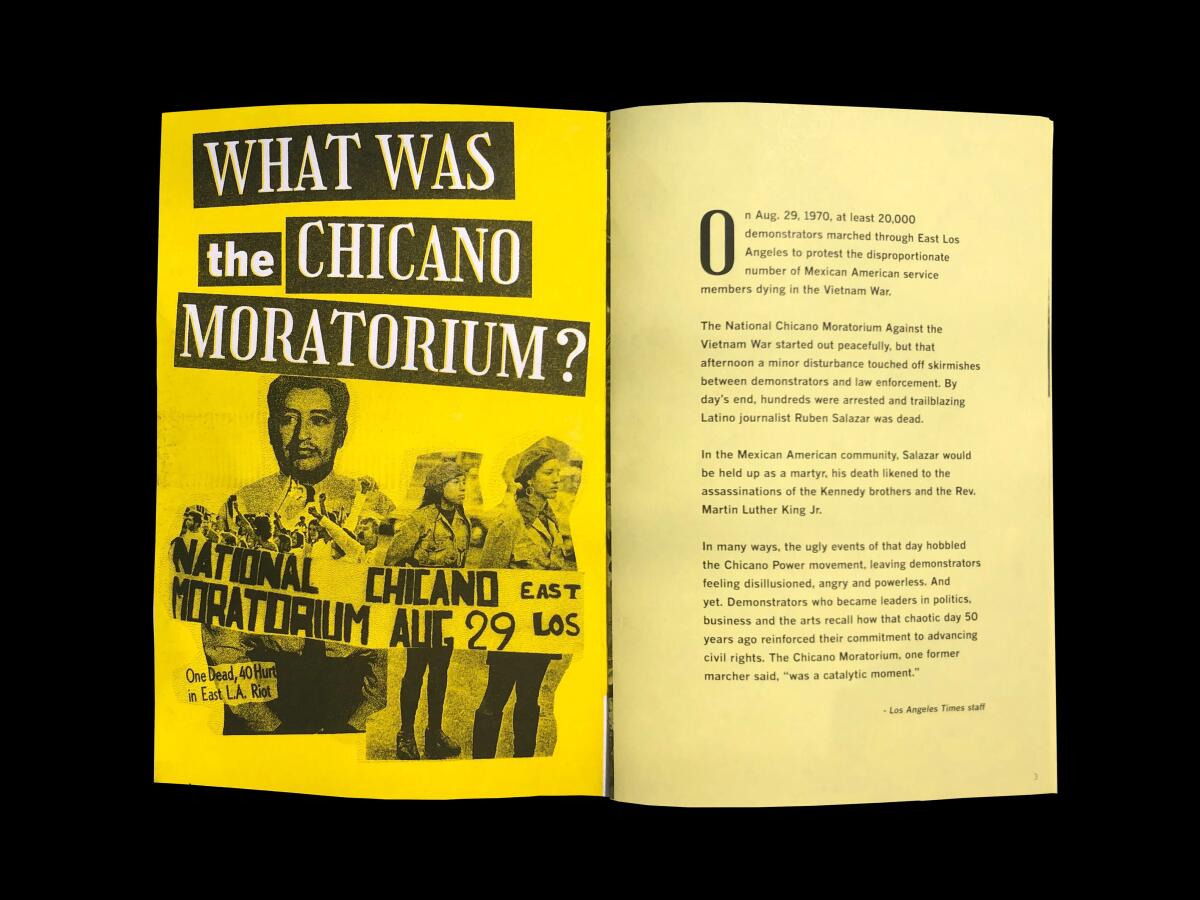
“The Chicano Moratorium: 50 Years Later” collects most of the series in a 36-page booklet. It’s available for sale at the L.A. Times store. The vibrant covers were printed at Los Angeles Risograph studio Tiny Splendor.
We’re also excited to offer the zine as a free download here. All you have to do is print it out on 8.5 x 11-inch paper and assemble. The pages are already laid out for booklet printing so that when the sheets of paper are folded together and stapled, the pages will read in the appropriate order. You also can view and read the zine in the appropriate order here.
How to print and assemble
Every computer, browser and printer is a little different: You may have to adjust some basic print settings to correctly order the pages.
There are a few key parameters to think about when you’re printing, including paper size (set to “letter” if it’s not already selected by your printer) and orientation (rotate the page layout to “landscape” if your printer doesn’t automatically orient each page horizontally).
All you’ll have to do is fold it all together and put a few staples along the binding.
You may need to experiment with a couple of trial copies to ensure the pages are oriented right-side up and in the correct order. We recommend perfecting your method on one copy before printing a large batch.
If you’re using double-sided printing
We recommend using a printer that can print on both sides of a page. Most copy machines and commercial printers can print double-sided, like those you might find at a copy shop or office.
Do a test run — our document is set up to easily print on such a machine. If the print does not come out the way you were expecting, turn on “short-edge binding” (or check the box labeled “flip on short edge,” depending on your printer), which can help orient your pages right-side up.
If you’re using single-sided printing
Most home printers fall into this category.
If you’re using this type of printer, you’ll have to print the file twice in order to achieve a double-sided print. First, hit “Print” and navigate to the paper handling settings in your printer’s system dialog box.
You’ll want to set the printer to output “odd only” first, meaning that it’ll print only the spreads on pages 1, 3, 5, etc. Once those are printed, you’ll need to feed those pages back into the printer tray and hit print again, this time with paper handling set to “even only.” This will ensure that the correct pages print on the back of the pages you’ve just printed.
We hope you enjoy our journalism and look forward to future projects like these. And if you can, please subscribe to the L.A. Times.
The full series remains at latimes.com/chicanomoratorium.
Buy the zine, and posters commemorating the Chicano Moratorium, here. | Print the zine for free here.
More to Read
Sign up for Essential California
The most important California stories and recommendations in your inbox every morning.
You may occasionally receive promotional content from the Los Angeles Times.
